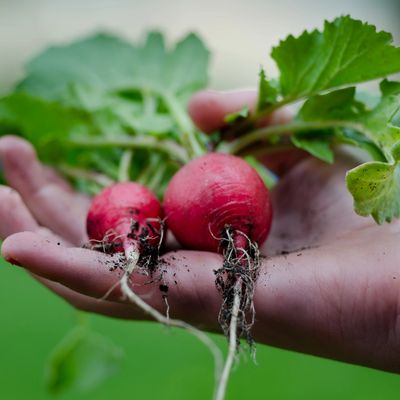
Growing Radishes
Radishes are quite easy to grow, require little care, and are ready to harvest in 4-6 weeks.
Plant 4-6 weeks before the average date of last frost, after aged manure or compost has been worked into soil.
Directly sow seeds ½ inch to an inch deep and one inch apart in rows 12 inches apart.
After they have sprouted, thin to about 2-inch spacing. Crowded plants will not grow well.
Radishes need sun. If they are planted in too much shade—or even where neighboring vegetable plants shade them—they put all their energy into producing larger leaves.
Plant consecutively every two weeks or so while weather is still cool for a continuous harvest of radishes.
Plan on a fall planting. You can plant radishes later than any other root crop in late summer or early fall and still get a harvest.
Radishes require well-drained soil with consistent moisture. Keep soil evenly moist but not waterlogged.
Radishes are ready to harvest in 25-50 days, depending upon the variety:
Cherry Belle- 25 days
Purple Plum- 30 days
White Icicle- 30 days
Black Spanish- 55 days
Watermelon- 55 days
Daikon- 60 days
Growing Rosemary
Rosemary, like Parsley, has the reputation of being extremely difficult for home gardeners to germinate. Our seeds are tested and germinate at a rate of 50%, which is quite high for Rosemary. Direct seeding outdoors is not always successful, so we recommend starting seeds indoors in trays or pots, three seeds per cell, and allow a minimum of 3 weeks for germination. Optimum germination occurs at around 62F, but room temperature is fine.
Growing Sage
Sage can be direct-sown into the warm spring soil after all danger of frost, but most gardeners find it easier to start the seeds indoors 6 to 8 weeks before the last anticipated frost.
If you direct-sow, press the seeds into your prepared garden soil about 1/8" deep. Water thoroughly. Keep the area well-watered and weed-free until the plants have established themselves. Germination will take approximately 7 days if your soil temperature is over 80F, 15 days at 70F, and 21 days at 60F.
Sow seeds indoors using pots or flats filled with a light soil mix, or seed starter mix. Press seeds 1/2" deep into your starter mix. Water immediately and keep soil moist. Seeds will germinate in 10-21 days. Seedlings can be transplanted to the garden when they reach 2" in height.
Sage prefers full sun and needs little water once established.
Growing Sorrel
Sorrel is a hardy perennial that can also be grown as an annual.
Start indoors in cell-type containers sowing 2-3 seeds/cell covering ¼”. Direct Seeding: Sow in fertile soil in mid-spring, seeds 1" apart, ¼” deep. Sorrel needs some light to germinate, so don’t plant more than ¼” deep.
For bunching sorrel, thin to 8" apart in rows 12-18" apart. For baby-leaf production sow 12 seeds/ft. and cut entire plants when 3-6" tall. Planting in light shade, and keeping the seed stalks cut increases summer quality, but a good crop will re-grow in fall even if plants bolt. I find that the flavor is best when grown in partial shade when temperatures are in the 60s.
Harvest side leaves until plants become well established; later, plants can be cut completely, right above the crown. Plants spread and can be divided.
Optimum germination: 58Fto 65F
Growing Spinach
Spinach will not germinate if the soil temperature is above 72F. It is a cool season crop. Soil temperatures in most of the US are not suitable for growing spinach between June 1st and September 15th.
Prepare the soil with aged manure about a week before planting, or, you may wish to prepare your spot in the fall so that you can sow the seeds outdoors in early spring as soon as the ground thaws. If you live in a place with mild winters, you can also plant in the fall.
Although seedlings can be propagated indoors, it is not recommended as seedlings are difficult to transplant. Spring plantings can be made as soon as the soil can be properly worked. It's important to sow as soon as you can to give spinach the required 6 weeks of cool weather from seeding to harvest. Select a site with full sun to light shade and well-drained soil.
Sow seeds ½ inch to 1 inch deep, covering lightly with soil. Sow about 12 seeds per foot of row, or sprinkle over a wide row or bed. Soil should not be warmer than 72º F in order for germination to occur. Successive plantings should be made every several weeks during early spring. Common spinach cannot grow in midsummer.
Plant in late August to late September for a fall crop, ensuring that soil temps are cool enough. Gardeners in northern climates can harvest early-spring spinach if it's planted just before the cold weather arrives in fall. Protect the young plants with a cold frame or thick mulch through the winter, then remove the protection when soil temperature in your area reaches 40º.
Growing Squash
Here are three cultivation tips to keep in mind for prime summer squash. Plant seeds 1” deep in warm soil. Space plants 18”- 36” apart. If the soil is below 60 degrees F., summer squash seeds are more likely to rot in the ground before sprouting. The ideal soil temperature for germination is 70-90 degrees F. Above 90F germination will be poor.
Seeds will sprout in 6 to 12 days. Provide plenty of nutrients. Summer squashes are heavy feeders. If you incorporated organic matter into the soil prior to planting, there is no need to fertilize early in the season. However, when the plants begin to blossom and set fruit, a side dressing of balanced soluble fertilizer is beneficial.
Water deeply. A steady water supply is necessary for the best quality fruit.
Water deeply once a week, applying at least one inch of water. Shallow watering promotes shallow root development that is detrimental to yields. Don't judge the moisture content of the soil by the dryness of the surface, if the soil is dry four inches down, water. If the soil is moist at that depth, the plants will be fine. Wilting in scorching, mid-afternoon sun is normal for summer squash. They will recover when the sun goes down.

Growing St. John’s Wort from Seed
Put your package of seeds in the refrigerator for a few days before planting. This will help your seeds germinate better.
Start seeds indoors about 6 to 8 weeks before your last frost date. St. John's Wort seeds need light to germinate; simply sprinkle seeds onto the surface and be sure to keep them evenly moist until they sprout, in approximately 10 to 20 days. Ideal germination temperature is 60F. Do not try starting them outdoors during the summertime! The soil is too warm and the seeds will rot.
Transplant to garden after the danger of frost has passed.
Growing Sunflowers
Sunflowers grow best in locations with full sun. They are remarkably tough and will grow in any kind of soil as long as it is not waterlogged. They do fine in soils that are slightly acidic to somewhat alkaline (pH 6.0 to 7.5). Once sunflowers get started, they can tolerate drought as befits plants whose ancestors grew happily in dry prairie regions. They are so easy to grow that they often plant themselves, springing up unbidden beneath a bird feeder.
Sunflower seed, leaves and stems emit substances that inhibit the growth of certain other plants. They should be separated from potatoes and pole beans. Where sunflower seeds are regularly used as bird feed, toxins from the accumulated seed hulls eventually kill the grass below. Harmless to animals or people, the toxins eventually biodegrade in the soil.
To plant in rows, space seeds about 6 inches apart in a shallow trench between 1 and 2 inches deep. In sandy soil, 2 inches deep is better. Cover and keep watered until seeds sprout in 7 to 10 days. When first true leaves appear (the second set of leaves); thin plants to about 2 feet apart. Depending on the variety, sunflowers will mature and develop seeds in 80 to 120 days. Sow a new row every 2 to 3 weeks to enjoy continuous blooms until the first frost.
Growing Swiss Chard
Before planting, soak Swiss chard seeds in warm water for 15 minutes to speed up germination. Sow seeds 1/2-inch deep and a few inches apart directly in the garden when the soil is at least 50°F.
Or sow them indoors anytime in standard-sized, 10-inch by 20-inch plastic flats of individual plugs filled with a soil-less seed starting or potting mix (place 1 or 2 seeds in each plug) and transplant seedlings into the garden when they're 2 to 3 inches tall.
Thin seedlings so they are 4 to 5 inches apart, or 8 to 10 inches apart if you plan to only harvest the outer leaves.
Plants do best in full sun but will tolerate some shade. They can endure light frosts in spring and moderate freezes in fall (though tiny seedlings are more tender).
Growing Tarragon
Tarragon seeds should be started indoors around April or before your area’s last expected frost. It’s usually easier to sow about 4-6 seeds per pot using moist, composted potting soil. Cover the seeds lightly and keep them in low light at room temperature. Once seedlings begin to sprout, or reach a couple inches tall, they can be thinned down to one plant per pot, preferably the healthiest or strongest looking.
Russian tarragon seeds will germinate in soil in approximately 10 to 14 days, but can germinate in as few as 7 to 10 days in dedicated propagation media such as Oasis Rootcubes, Rapid Rooters, or Grodan Stonewool.
Growing Thyme
Thyme is easy to grow from seed though germination is slow, taking from 14 to 28 days. Seeding best started indoors in a flat where temperature can be kept around 70°. Thyme seeds are very small, 170,000 to the ounce.
Keep your seeds moist during the germination period, but make sure you don’t add too much water at any time. It is best to use a spray bottle to mist the growing medium as pouring water can cause the seeds to float out of your medium.
Sow thyme seed in sterilized growing medium either in shallow rows or scatter on top, with little or no covering. After they take root, have been transplanted to 2- 1/4" peat pots and reach a height of 2-3 inches, they may be moved outside to cooler weather. For small gardens, space plants about 9 inches apart, for field production space plants 12-18 inches apart in rows 3 feet apart.
Thyme prefers a sandy, dry soil. Avoid planting in heavy, wet soils. Nutrient requirements for Thyme are not heavy, so soil should only receive a moderate amount of fertilizer. Diluted fish emulsion may be used in the early summertime.
It is important to control weeds as they compete for nutrients with the slow-developing young thyme plants. Once established the plants would benefit from mulch to help discourage weeds. This also keeps the lower branches clean, whereas open cultivation exposes the lower branches to rain’s action on bare soil.
Growing Tomatoes
Tomatoes plants have three main requirements- sun, water, and a well-drained, rich soil. The more sun you can get your plants the larger your yield. You really need at least 7 hours of June sunlight per day to grow decent plants, and 12 hours should get you beautiful plants, with a lot of tomatoes.
Soil
Your soil needs to be well-drained, whether in a container or in your garden. We recommend a mix of 20% sand, 20% perlite (or peat, although perlite is far superior), and 60% compost for containers. If you are planting in an outdoor garden it never hurts to condition the soil with sand and compost. When purchasing sand, be certain you do not use sandbox sand- you want "cut" or "builders" sand, although Quickrete-brand all-purpose sand works well too. Make sure you don't accidentally buy the concrete mix!
Propagation
Start seeds under soft-white fluorescent lights 7-8 weeks before soil temperatures in your area reach 62F, and the danger of frost is past. Don't worry about buying the expensive "grow lights" as the soft-whites work just as well. The shoplight hanging fixtures cost $8 or $9 at Lowe's or Home Depot. If you buy two of them, 4 bulbs, and a cheap timer your total investment shouldn't exceed $25.
Start seeds in trays filled with seed starter mix or use jiffy pellets. Make sure that your trays are adequately drained and that you have your lights about 1 inch above the soil. The preferred air temperature is at least 67F, with warmer being better. Your lights should be on for 12 to 14 hours a day- a timer works well for this. Once the seeds have sprouted you will want to adjust the lights so that they are within 1 inch of the leaves. If the lights are too high, the plants become leggy (tall and skinny). Don't worry too much about the leaves touching the light bulbs.
It is possible to grow tomatoes in a window, although I have never had much success with this technique. You really need a bay window, facing south, to get the job done.
Once the plants have reached a size (2") where they are crowding each other in the trays, or roots are starting to emerge from the netting around the Jiffy pellets, you will want to transfer them to 3.5" or similar pots. Mum pots work well for this, as do 16-ounce plastic cups with holes punched in the bottom. Plants will not become rootbound when planted in these containers until they reach 12 to 14 inches in height. When you transplant them take care not to damage the roots, and make sure the mix in the receiving pot is moist. Seedling roots die almost immediately when exposed to air or dry planting mix. Pepper seedlings need to transplanted at the same soil level, while tomato seedlings can be planted deep enough that the soil is over the first set of leaves (remove them first by plucking, not tearing).
Keep the plants under lights for 13-14 hours per day until it is warm enough to take them outside for a few 70F+ afternoons. Take care to keep them sheltered from the wind. Make sure they don't spend more than 15 minutes in direct sunlight the first day as the leaves will sunburn- it's best to start in the shade for a day or two, then work yourself to part shade, and then full exposure. If the low temperature will remain above 52F you can leave them outside overnight.
After a few days you can leave them in direct sunlight for an hour or so. Gradually acclimatize to direct sunlight, and don't expose to temperatures under 52F. Once your garden (or container) soil temperature reaches 62F, you can plant (provided you won't see more than a couple nights in the 40's). If you plant too soon, the roots get chilled and the plant never fully recovers.
Planting
Plant tomato seedlings deep! You can pull off the bottom two leaves and bury it up to the next set of leaves. They will form roots on any portion of the plant that is in contact with moist soil. Now, here is where many tomato gardeners fail. They rush to get their plants in the ground as early as possible. Big mistake! When you dig your hole you want to feel soil that is not cool to the touch. If it is, leave the hole open for at least a week to allow the soil to warm sufficiently. If you have a thermometer, use it. I always pour a bucket of warm water in the holes about 20 minutes before I plant.
Many people wonder how large their tomato plants should be when placed in the garden (or large container). The plants pictured below are ideal in size (left pepper, right tomato). You generally don't want fruit to be forming on your plants, but flowers are fine.
When you remove the plant from the pot take care not to bend the stem. You can gently pull the roots apart so that they aren't tangled.
Containers
Tomatoes do great in containers. In fact, I have found that they consistently perform better in 15-gallon containers than in the garden. Anything under 7 gallons is a waste of time without fertilization. You may grow a nice-looking plant, but few tomatoes will be present. There simply isn't enough soil volume to provide the roots with enough room to grow.
It should be noted that container soil is much warmer than garden soil during most of the season. This gives container gardens a distinct advantage during the early season, but can cause some problems in July and August. When daily high temperatures reach the high 80's and 90's, you really need to liberally water all container plants on a daily basis. This helps to keep the soil temperature below 80F. The Cherokee Purple shown below (16" container) yielded 36 tomatoes last year. This picture was taken 3-4 weeks after transplant.
Staking
Almost all tomatoes should be staked unless you can tie it to a fence or railing, like I did above. I have found that the vinyl-coated stakes available at Home Depot and Lowe's work well. Tomato cages and boxes work great too. You can let tomato plants grow along the ground (un-staked) but you will find that the insects beat you to many of the fruit.
Pruning
When I was a kid everyone said you had to prune, or "sucker", tomato plants. Supposedly the suckers would suck all the energy out of the plant. It's a great theory, the only problem is that the suckers grow tomatoes too. My personal experience has shown no real difference in production between pruned plants and non-pruned plants.
Pollination
Depending upon which part of the country you live in, pollination can be an afterthought, or a real problem. In Central Ohio we get a lot of warm humid nights during the month of June where the temperature doesn't fall below 70F. During these hot, humid periods pollination of tomato plants is difficult. One theory claims that the pollen grains become too sticky, and thus are difficult to transfer. I tend to agree. This problem becomes evident when you have a beautiful tomato plant, but few fruit. The best you can do is hope the weather changes, or do a google search for "manual tomato pollination". It's really not that difficult.
Fertilization
I have always used MiracleGro products simply because they are made locally (or were) and are easy to handle. Other brands are generally of equal quality. Read the label and always apply as directed. Do not over-fertilize; you are just wasting money and can burn the plant's root system.
Watering
Water plants every 3-5 days, depending upon rainfall. Tomatoes generally like around 4-5 inches of rainfall per month. Plants will start to wilt if they need water.
An inch of water in a container is exactly what it sounds like- pour water into the pot so that about 1 inch is present before it soaks into the soil. Containers, however, require a lot more water than an in-ground garden. When daytime temperatures reach the high 80's I tend to water the garden every other day, and container plants daily.
You should always use cool water. Some rain barrels can practically boil water if exposed to the sun for too long.
Problems
A common problem that faces tomato growers in the Midwestand East is blossom-end rot. You may have read that it is caused by "inconsistent watering"; this is usually not the case. This problem is almost always caused by a lack of calcium in the soil. It is quite easy to correct- add crushed, cooked (hardboiled) eggshells around the plants at a rate of 3 or 4 eggshells per plant. Another excellent soil additive is crushed oyster shells. They are available from several online vendors.
If you are a tobacco user, either smoker or chewer, you need to wash your hand well prior to handling your seeds and plants. You can infect your garden with the tobacco mosaic virus (tmv), which affects both tomatoes and peppers.
Growing Watermelon
Watermelon is a space hog; vines can reach 20 feet in length. So plant where there is plenty of open ground. Amend soil with organic matter such as compost or composted cow manure. Add a balanced fertilizer that is high in nitrogen. Sow 8 to 10 watermelon seeds in a hill, and push seeds 1 inch into the soil. Space hills 3 to 4 feet apart, with at least 8 feet between rows. Thin plants to the 3 best in each hill. Keep soil free of weeds by shallow hoeing or with a layer of mulch.
Watermelon plants have moderately deep roots and watering is seldom necessary unless the weather turns dry for a prolonged period. When vines begin to ramble, side dress plants with half a cup of balanced fertilizer (5-10-5). A third application of fertilizer should be made when melons are set. Withhold water as melons start to mature to intensify sweetness.
When vines begin to ramble, give watermelon plants a dose of boron to help them produce sweeter fruits. Dissolve 1 tablespoon of household borax in 1 gallon of water and spray foliage and the base of the plants. Select short-season varieties such as 'Million Bucks Hybrid' or 'Orange Sunshine Hybrid' if your growing season is less than 90 days. Start watermelon seeds indoors and use black plastic mulch.
Cucumber beetles and vine borers are the worst watermelon pests. Apply an insecticide such as Sevin or use Bacillus thuringensis for organic control. Floating row covers work, too, but they should be removed when watermelon plants start to bloom, at which time pollinating insects must be allowed to reach the flowers.
Growing Zinnia
Zinnias can be direct sown or transplanted into the garden. In warmer areas with long growing seasons, sow zinnia seeds directly into the garden after all danger of frost has passed. Sow into well-prepared soil free of large clumps. Lightly cover seeds with a dusting of soil since zinnia seeds need light to germinate. Keep soil moist until plants are established.
In colder regions with shorter growing seasons, sow seeds indoors about 4 to 5 weeks before the last average frost. Make sure soil temperature is kept at 70 to 80 degrees F. for good germination. Use a high quality seed starting soil mixture. Don't use garden soil as it's usually too heavy and can cause disease problems indoors.
Zinnias don't like being transplanted, but if handled carefully they will do fine. Sow seeds in peat pots that can be directly transplanted into the garden. Place zinnia seeds on soil surface and lightly press into the surface. Cover with a light dusting of soil mix. Lightly water and cover with clear plastic or glass to keep seeds from drying out. Seeds should germinate in 4 to 7 days. Once up, remove cover and keep soil evenly moist.